intuitionbase.com / Tutorial: Wireless NetworkingWritten by: Eldee Stephensarticle originally published by the author on intuitionbase.com (08/09/12) It may seem odd to bother with wireless networking on our next-generation Amigas; after all, they are -- at least for the moment -- all sedentary desktop systems. But wireless networking is still a very useful add-on, even if our machines don't see too much movement. For one thing most homes already have a wireless router, and having wireless capabilities on our Amigas mean being able to place it anywhere in the home or office we choose, without worrying about Ethernet cables. The first thing is to grab a copy of the Prism2 driver package, courtesy of Neil Cafferkey. The driver supports nearly any PCI-based networking card that uses the Prism2 chipset. You can download a copy on OS4depot. In the archive you'll find an AmigaGuide manual that spells out which PCI cards are supported, and which aren't. For our purposes here we're using a NETGEAR MA-311 card. It may have been discontinued some time ago, but there are so many floating around, you'll find one on eBay or Google Shopping quite easily. I've picked up a couple over the years, and they never cost me more than $20USD. 
Now this is where it gets a little tricky. Installed along with the driver is the WirelessManager tool. This sets up your PCI card with the correct authentication information prior to any connection attempt. If you are using AmigaOS 4.1 Update 5, this is a little easier. Simply edit the S:Network-Startup script so that it looks like this: Notice that the call to the WirelessManager tool must go before the AddNetInterface call. If you don't do this, it will not work properly. During driver installation, the installer should have allowed you to create the parameters file for your network that describes the network name, authentication method, and password. If you skipped over that, no problem, we'll go ahead and create it now. In a text editor create a new file to be saved as ENVARC:Sys/Wireless.prefs. Depending on the type of authentication used you'll want to create an entry for your router that corresponds to one of the examples below:; $VER: Network-Startup 53.2 (01.06.2011) Run <>NIL: C:WirelessManager prism2.device AddNetInterface QUIET DEVS:NetInterfaces/~(#?.info) ; Add below this line applications that need a running network For some reason folks tend to have a little difficulty adding or modifying networking options on the Amiga -- which is surprising considering how easy it is. So we'll try a step by step approach, complete with plenty of screenshots. First thing: open the Internet prefs tool in your Prefs drawer on your System disk. Figure 1: Internet Prefs Tool
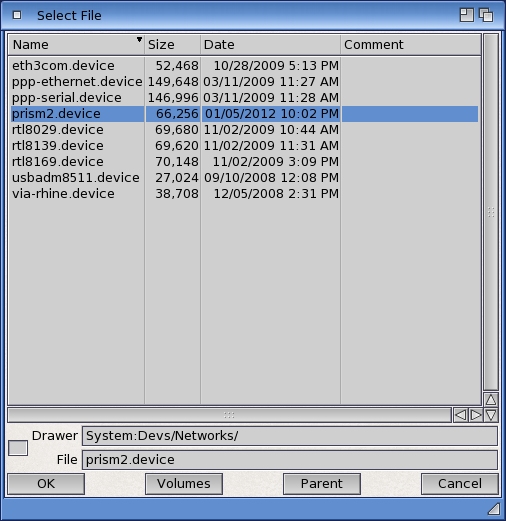 Figure 2: Device Requester
 Figure 3: Interface Setup
 Figure 4: DNS Options
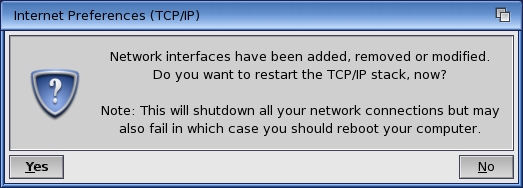 Figure 5: Restart Requester
 Last updated: 08.09.12 |