A1222 Guide: Initial Build and SetupWhat hardware should I select to build my A1222?Now that we know the A1222 will be offered through AAA Technology, you have a choice to make. Do I go with the complete system or just purchase the motherboard and build my system from scratch? When I started this journey in what seems like a geological epoch ago, we only had the motherboard, so I'm assuming you'll choose the latter. If you go with the already configured system, you can probably skip this section and the section on disk setup since everything is ready to go once you plug your system in. First Steps Before you do anything make certain that you have the following components if you're building your A1222 from scratch. We'll go through each needed component in this section
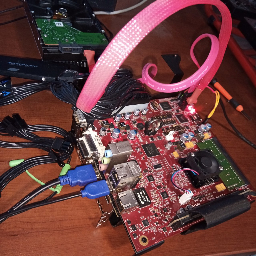
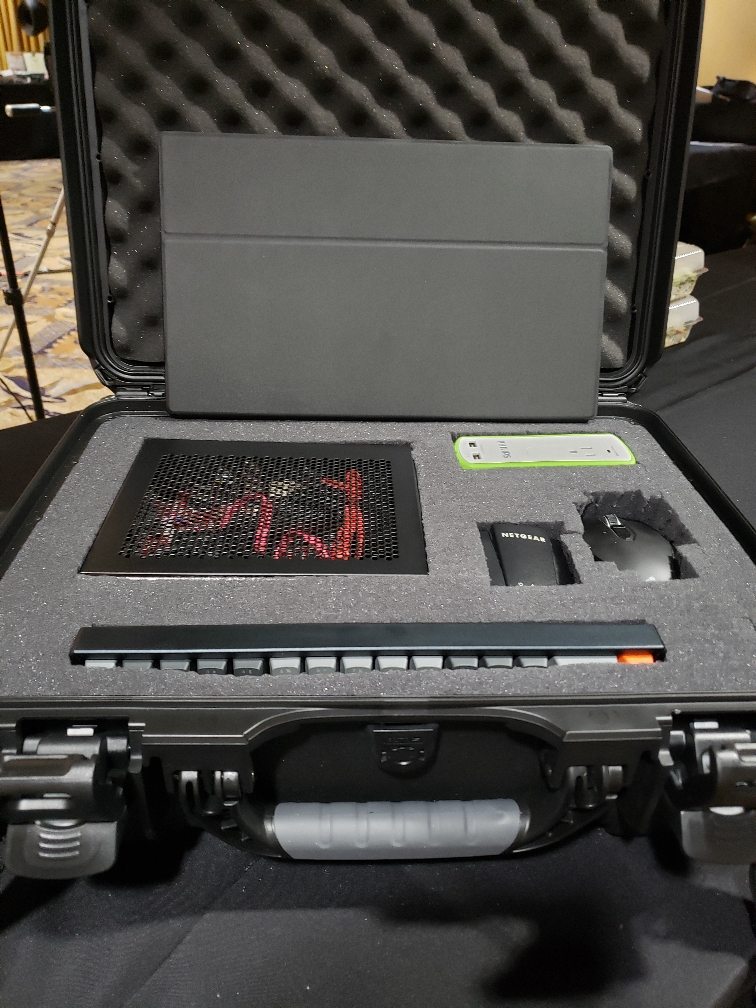
 Cases and PSU Selection The Mini-ITX form factor offers a ton of flexibility that larger boards do not. You could retrofit an old Amiga 500 case, for instance; or use one of the Checkmate series of enclosures. You'd be surprised how small you can get your A1222 build. Mine has become my go-to travel Amiga (see picture). Obviously a laptop would be even better. Hans de Ruiter got fairly far in that effort (link), but Tony Wyatt took his Tabor board and a briefcase and was able to make this:  Most of us will want to use an off the shelf case option, however. There are plenty available from Lian Li, NZXT, Silverstone, Corsair, In-Win, and other major case manufacturers. Don't overlook boutique makers, though. Options like the Skyreach 4 Mini allow to go properly small but with room enough for a full-size, dual (or even triple) slot GPU. Keep in mind that you can't go nuts and get something like the LZMod DC-M1 since we do need an external graphics card. Also pay attention to your power supply when doing your build. The Tabor board itself sips power and requires little cooling or air movement, but it's doubtful you'll be able to say that about your GPU. As of this update in March 2024 the A1222+ will ship as a pre-configured system from AAA Technology, but you can also just purchase the motherboard. If you do go for something small in terms of cases since beyond the graphics card, you can't really expand it anyway. Here are some of the cases I investigated over the past year or so:
 Graphics Cards As for GPUs there are a ton from which to select. You'll need the latest versions of the RadeonHD and RadeonRX drivers, and Warp3DNova for 3D support, but all of that comes with the A-EON Enhancer Software pack, and I'm confident that will be bundled with the A1222 when it ships. Any card supported by those drivers will work so long as it has a PCIe x16 connector. Keep in mind that although the connector is x16, electrically it's only x4. I haven't tried any splitters for this reason due to bandwidth considerations. I highly recommend going with a RadeonRX card. In the past you had better support for legacy Warp3D games with the Southern Islands-based RadeonHD cards, but with Warp3DNova, that is no longer the case. The supported RadeonRX cards will deliver accelerated HD video playback as well as better 2D and 3D performance generally. Any of the following should work according to A-EON:
Memory Like most mini-ITX boards and some laptops the A1222 uses standard 1.5V DDR3 SO-DIMMs. While the P1022 memory controller supports ECC DIMMs, the boards have generally been tested with unbuffered, non-ECC SO-DIMMs running at 800MHz. Since you'll probably be buying this for AmigaOS, no point in purchasing anything larger than 2GB in size. If you want to test GNU/Linux (install guide) or FreeBSD on your A1222, you can go larger. I actually went with something a tad faster since -- in theory -- it should work fine: a 2GB 1333MHz non-ECC SO-DIMM from Kingston. If you want to grab the same one the SKU is KVR13S9S6/2 and it is available on Amazon. Hopefully your board will come with memory already installed. If it doesn't trust to your dealer's recommendation or ask the guys at AAA Technology. Software Setup Due to various political reasons, which we need not go into here, the AmigaOS install image from Hyperion cannot actually boot the A1222 if you have a RadeonRX card. It also can't read SFS volumes if you've got a disk drive already available from another Amiga. So, for the moment, just use the Rescue USB drive provided from AAA Technology. It has both AmigaOS and the needed Enhancer Software bits from A-EON to make everything work. Once your system hardware is connected up, just boot from the USB drive as indicated in the manual included. The default system setup will have bits of Enhancer Software that you may or may not like. Personally I prefer AmiDock over X-Dock, for example, and I don't use the Enhancer software datatypes -- I use WarpDT instead. So you may need to customize a bit to your liking after the install. Make sure to use NGFS rather than SFS when formatting your internal disk drive. More details on that in the next section of the Guide. As far as on-board hardware, good news! Unlike the X1000 or X5000 when they initially shipped, all your HW is well covered by included drivers. The two gigabit Ethernet ports on the rear of your motherboard are fully supported. You set up your Internet connection just like any other Ethernet option, only use the a1222eth.device driver supplied by A-EON. You'll find it in the DEVS:Networks drawer on your system disk. Unit 0 maps to the port above the USB sockets and Unit 1 to the right-most port. There also exists a second Ethernet driver developed by Jaime Krueger that takes advantage of the NPAA engine on the P1022, i.e., it's faster. I do not know if or when it would be released for public use, but the one included from A-EON works just fine. USB2 support on the A1222 is the same as on any NG Amiga, which means it can be hit or miss with certain devices. One of the oddest issues with the A1222 is that it seems more sensitive to over-current detection than other systems. This can occasionally be encountered when plugging the more expensive, higher-end mechanical keyboards out there. Why this is the case I have no idea, and my hope is that it was addressed with the A1222+ updates. So for some reason my expensive custom USB 65% keyboard refuses to work reliably, but cheap Logitech keyboards from Wal-Mart work with no issues. Go figure. One inexpensive option is the AmigaOne keyboard from A-EON, Cherry switches and all. If for whatever reason you do not want to use on-board Ethernet, you can also use USB-to-WiFi devices compatible with the usbadm8511.device driver included in DEVS: in the default installation. More on that can be found on amigans.net. Audio is supplied by the WM8776 audio chip on the Tabor board and is supported by the a1222.audio device developed by the incomparable Lyle Hazelwood. It works very well, and there is also a special Mixer tool that allows you quite a bit of control over the codec. There is also a VU meter that displays from data in real time. It does tend to be picky about your AHI settings, though. Here are the settings that work for me: 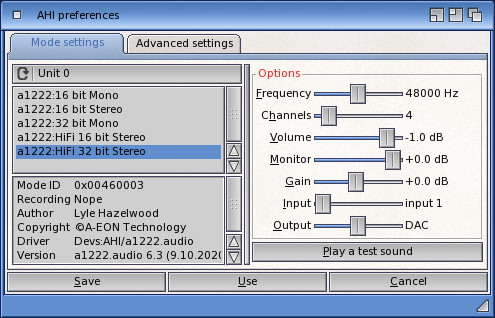 Another quirk is that some audio software is floating-poing intensive. So one program will work brilliantly and another might slow the system down. Tools in the latter category are a small minority, but's annoying when you find one. Games or sound players decoding Ogg Vorbis audio, for example, have a bizarre "stutter' when playing. You'll know it when you see it. The last bit of system setup information you'll need is on disk and filesystem selection, but since it has quite a bit of supporting data, I've moved that section to its own separate page. 


Introduction | Initial Build | Disk Options | Recommended Software Tools Compatibility | Games Compatibility | Tips | Benchmarks | FAQ | Links Last updated: 08.07.24 |